www.industry-asia-pacific.com
09
'23
Written on Modified on
FLATNESS AND CONTOUR MEASUREMENT IN A NEW DIMENSION BY HIWIN
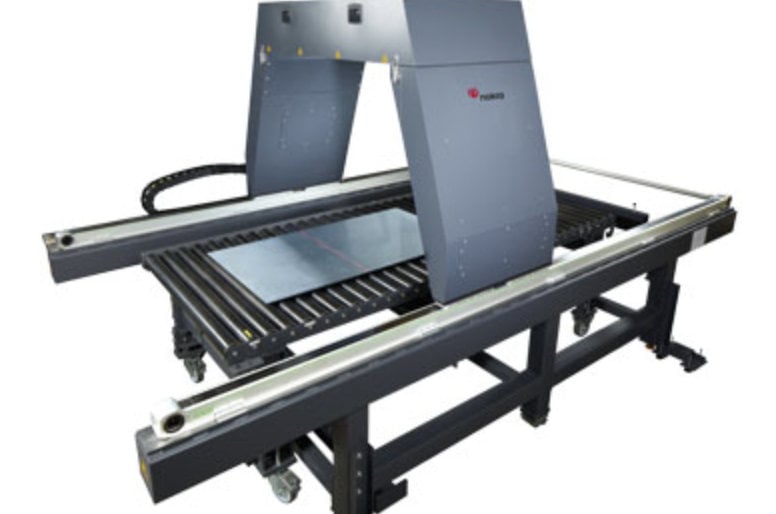
The measuring systems from Nokra Optische Prüftechnik und Automation GmbH measure the flatness, contour, thickness or width of a wide variety of their customers' strips and sheets without contact and automatically. The measuring systems are kept on course by HIWIN axes with toothed belt drives.

Standardised special plant construction - a combination that is actually mutually exclusive. But not at Nokra GmbH, based in Baesweiler near Aachen. The machine manufacturer specialises in laser measuring systems for automatic inline inspection of geometric features of products in the metal and automotive supply industry. For this purpose, the medium-sized company has developed standardised measuring systems from its special systems without further ado. This enables Nokra to provide its customers with exact measuring results from the standard segment, which can be individually adapted to the respective application requirements.
As one of the first companies, Nokra has also successfully introduced the method of laser triangulation to the inline inspection of geometric measured variables. The optical distance measurement is carried out electronically via laser and fully replaces the X-ray method, which is often negatively affected by its reservations regarding radioactive radiation.
Two measuring methods in one system
Up to now, flatness and contour measurements were only possible in two different measuring cycles. With the alpha.fi compact, Nokra has made it possible to document and prove two measurement values in one measuring process. Without operator influence, the alpha.fi compact determines objective and traceable data on the flatness and contour of steel, aluminium and non-ferrous metals. Thanks to the automatic feedback of the measurement results into the production process, cost-intensive errors within the production can be avoided and the productivity and economic efficiency of the entire production process can be increased.
In addition to the technically flawless design, the measuring systems also score points with their design: "Of course, we place great value on our systems being visually eye-catching as well," smiles Natascha Classens, technical product designer at Nokra. "The linear axes from HIWIN fit perfectly into the concept." HIWIN already won the reddot award for its linear modules in 2016.
HIWIN puts Nokra laser measurement systems on axis
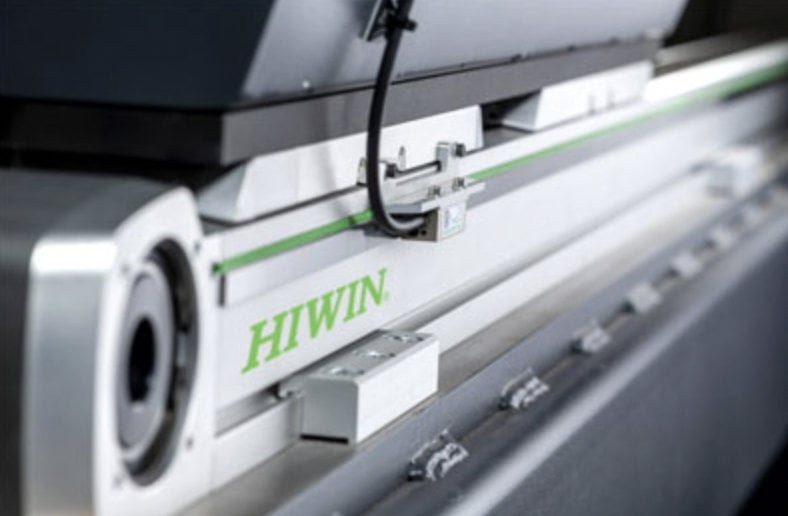
HIWIN's precise linear axes with toothed belt drive are used to position the measuring systems. However, before the compact and flexible positioning modules from the drive technology specialist were installed, a combination of a ball screw drive and profile rail guides was in use. "Not only was the design effort higher, but also the assembly effort," says Sebastian Müller, production manager at Nokra. The linear axis with toothed belt drive now also enables longer travels. The stroke can be freely selected in millimetre steps. This is ideal for the infinitely scalable measuring length of the alpha.fi compact with up to 6,000 mm.
Connected to a synchronous shaft, the HM-B axes become a double axis in no time at all. With repeat accuracies of ± 0.05 mm, exact positioning accuracies of the measuring system are ensured. This makes the double axis particularly suitable for gantry applications, such as the laser-based measuring system alpha.fi compact.

Feedback directly in the production process - sensors are crucial
The digitalisation of production data has been a decisive competitive factor in many manufacturing processes, and not just since Industry 4.0. Production data continuously lead to a better understanding of production and thus to quality assurance already during the production process.
Specially developed and built Nokra sensors are used for the exact recording of the measured values. The high measuring frequency, the measurement that can be synchronised exactly in time and their high dynamics in relation to the scattering properties of the measuring surface distinguish the sensors. "This is one of our major competitive advantages. No sensors are as precise as ours," says Sebastian Müller, production manager (Nokra). The sensors check within the measuring system seamlessly and automatically in the production cycle. Measuring accuracies for the contour of up to ± 0.1 mm and for the measurement of the flatness of up to ± 0.025 mm are guaranteed. The accuracy and traceability of the measured values are aligned to national and international norms and standards (DIN/EN, MSA).
The values recorded during the measurement are immediately displayed as a 3D representation on the control stand. Thanks to the automatic feedback of the measurement results to the production machines, inaccuracies are detected directly in the production process and corrective measures can be initiated and implemented immediately.
Delivery capability - that makes the difference
Despite the small production team, Nokra delivers around 25 measuring systems per year - and always on time. "On-time delivery of the systems is a major competitive advantage, so the ability to deliver the components naturally also plays a major role," reports Natascha Classens, technical product designer (Nokra). In HIWIN, the measuring system manufacturer has found a reliable partner when it comes to drive technology. The short and punctual delivery times have always been the hallmark of the Offenburg-based specialist for drive technology. "And we are also convinced by the flexible accessories such as the displacement measuring system," Natascha Classens, technical product designer (Nokra), continues.
www.hiwin.com

