TAKAM uses XK10 to ensure assembly accuracy of machine tools
For machine tool makers, to achieve manufacturing efficiency depends on fast and accurate quality control processes. With traditional error testing methods beginning to hinder operations, TAKAM Machinery Co., Ltd (TAKAM) turned to Renishaw's XK10 alignment laser system to deliver precision, efficiency and speed.

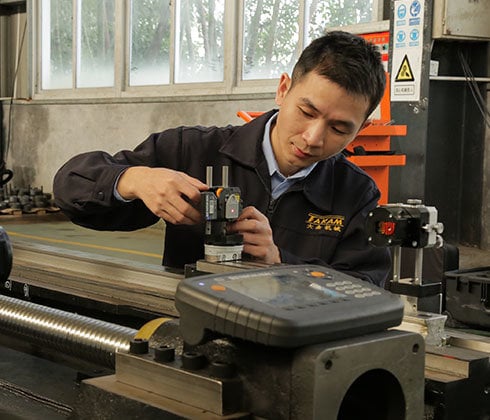
TAKAM using XK10 to ensure assembly accuracy of machine tools
Background
Founded in 1989 in Xiamen (China) TAKAM is an international manufacturer of CNC machines. Its extensive product portfolio comprises milling machines, vertical, horizontal and gantry machining centres and lathes.
Providing CNC machines to a variety of industrial sectors, including aerospace, automotive, electronics and mould and die.
Strict quality control is the foundation of TAKAM's manufacturing ethos and it is committed to continuous improvement in both product design and production.
To complement more traditional methods of geometric and rotational measurement during CNC machine building, TAKAM had long adopted a range of Renishaw calibration products to ensure accurate alignment of machine axes.
For many years the company has been using Renishaw's XL-80 laser interferometer, QC20-W wireless ballbar and XR20-W rotary axis calibrators, to constantly check for any errors in the machine tool build process.
Challenge
At every stage of the CNC machine tool build, including component casting, machining and assembly, there must be rigorous testing and calibration performed to ensure the overall precision of the machine tool.
In an increasingly competitive global market, the more traditional methods of identifying potential geometric and rotational errors, including granite squares, dial gauges and autocollimators, began to impede TAKAM's manufacturing and quality control processes.
Difficult to perform and susceptible to operator error and misinterpretation, such manual measurement methods bring significant limitations. For example:
- Granite squares: equipment weight and size mean logistics and storage are a challenge and a risk to personnel safety, whilst setup and operation requires experienced personnel.
- Dial gauges: contact-based testing tools are prone to error accumulation, depending on operator experience and environmental factors.
- Autocollimators: simple to use for single axis linearity measurements, but extremely time-consuming when measuring multiple axes and parallelism.
Such traditional error measurement methods were ultimately failing to keep pace with TAKAM's elevated testing efficiency and stringent accuracy requirements. They needed to be replaced on a universal basis.

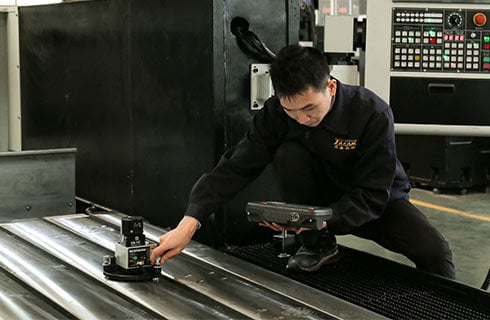
Using the XK10 for perpendicularity measurements
Solution
To resolve the inefficiencies and inconsistencies being introduced by a range of traditional error measurement tools, TAKAM elected to use Renishaw's XK10 alignment laser system.
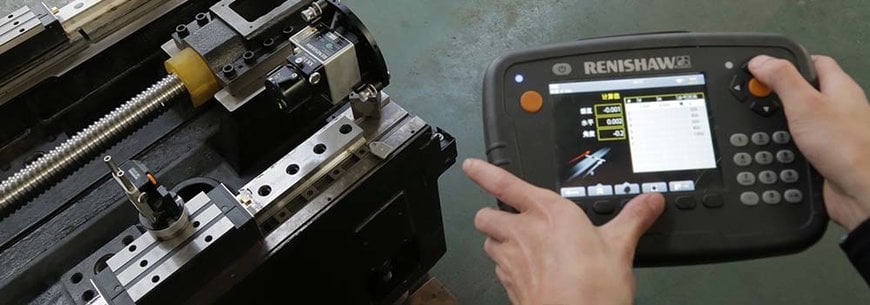
An all-in-one digital measurement solution suitable for a range of different CNC machine tools, the XK10 comprises a launch unit for primary laser transmission; wireless transmitter and receiver units; a portable display unit and a fixturing kit. An additional parallelism kit allows users to carry out parallelism measurements.
The XK10's compact size, wireless connectivity and versatile fixturing means it can be used in many different configurations, enabling measurement of errors across all types and sizes of machine tool. It can be applied to linear rails to ensure that they are straight, square, flat, parallel and level, and in spindles and chucks to assess direction and coaxiality of rotary machines.
The XK10 display unit is designed like a small tablet computer and enables the operator to collect, analyse and record measurement data. It provides step-by-step instructions for each type of measurement, with easy-to-understand graphics and real-time readings guiding the operator through each stage of the measurement process.
Mr Huang Zhifeng, Factory Manager at TAKAM, said, "When looking for a suitable alignment checking system, we closely compared the Renishaw XK10 with a number of autocollimators and other devices from different manufacturers. It was determined that the XK10 had a number of clear and distinct advantages."
"The display unit's graphical interface and reporting are both highly intuitive, so operators can see at a glance what they need to do next, meaning they don't need to remember cumbersome processes. It really does help simplify the job. The fixturing options also massively reduce setup time."
Since we brought in the XK10, a single operator can complete the process in less than two hours, so the workforce can be allocated far more flexibly than before. TAKAM Machinery Co., Ltd (China)

The Renishaw XK10 laser alignment system makes use of wireless communication technology
Results
Renishaw's XK10 alignment laser system is today being used in the quality control processes of most models of CNC machine that TAKAM produces, including vertical, horizontal and gantry-type machining centres, milling machine and lathes.
Mr Ma Feng, Quality Assurance Manager at TAKAM, explained, “Whether it's in component machining, machine tool assembly or whole-unit testing, and whatever the machine tool is, we're now using the XK10 alignment laser system to check for errors.”
"The system has increased overall testing efficiency by at least a factor of three compared to previous traditional testing tools. For example, we needed two operators working for more than four hours just to measure the linearity, flatness, verticality and parallelism of a 20 m gantry-type machining centre. Since we brought in the XK10, a single operator can complete the process in less than two hours, so the workforce can be allocated far more flexibly than before."

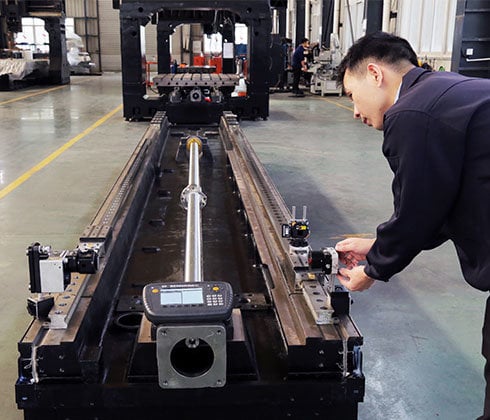
Long range parallelism with XK10
"Portability is another major strength of the XK10. An operator carrying an XK10 kit can complete machine testing independently, which also saves us the expense of buying large numbers of granite squares. It also removes the headache of having to transport extremely large and heavy granite squares for measuring long-travel machine tools."
"The XK10 has a measurement range of up to 30 metres, which makes it easy for us to perform different types of machine measurement with a single instrument, something that would have been quite impossible to achieve with traditional tools."
www.renishaw.com

