www.industry-asia-pacific.com
29
'19
Written on Modified on
FARO® introduces CAM2 2019 Metrology Software
The World’s Smartest 3D Measurement Software Platform.

This includes the recently introduced FARO PrizmTM Color Laser Line Probe and the 6Probe Laser Tracker product families.
This release has evolved from extensive user feedback to the well-received CAM2 2018 introduced a year ago. CAM2 2019 sets a new standard for intelligent metrology via improved ease of use, interactivity, flexibility and targeted, actionable intelligence.
Enhanced Usability and Efficiency
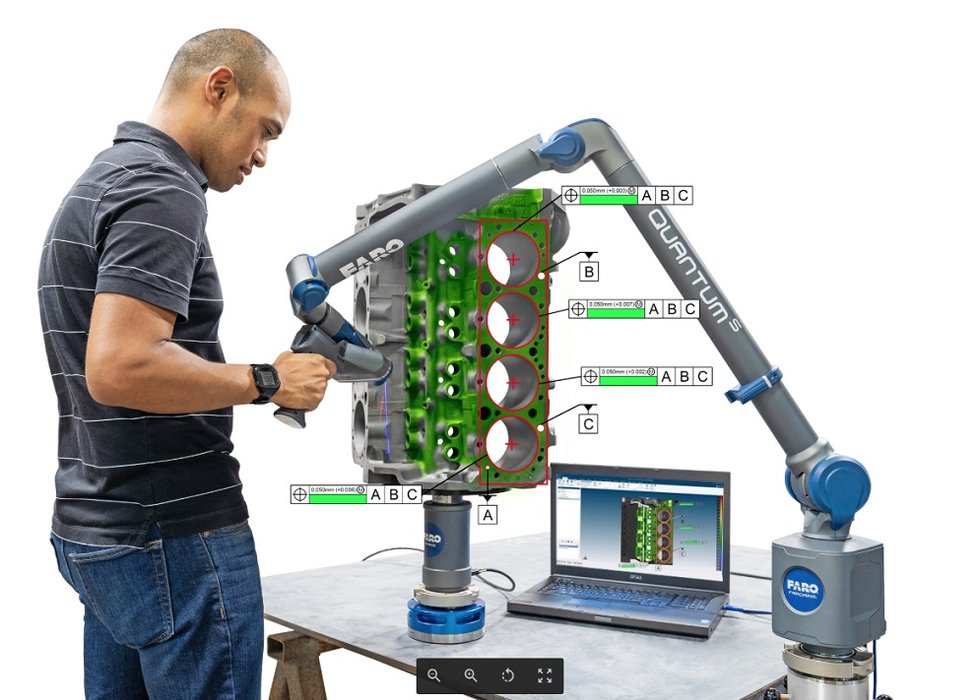
In addition to the tight integration with FARO metrology products that enables a seamless user experience, CAM2 2019 extends the narrative for high value interactivity and usability. For example, 6Probe users are now able to program button configurations and then interact with the software through the device in real time. Additionally, FARO Laser Line Probe users can benefit from immediate visual feedback of part quality via live deviation color scans.
Finally, with Built-In Universal CAD Importer, all major CAD file formats can be directly imported into CAM2. This improves the workflow by eliminating the need for time consuming “double translations”.
Smart Guidance
CAM2 2019 features a standard set of software instructions, or routines, which automatically guide the user through specific operations, visually and audibly. This dramatically lowers the bar for the technical expertise required to use FARO 3D measurement solutions, shortens the workflow and allows users to direct their primary focus on the measurement results themselves.
Additionally, preset Scanning Profiles further streamline the end to end process by enabling users to select the appropriate scan setting for the specific part type with the click of a button.
Actionable Intelligence Through Statistical Process Control (SPC)
CAM2 2018 featured the Repeat Part Management (RPM) Control Center, an integrated, web-based dashboard reporting tool that delivers real time inspection results and insightful trend analysis in a user-friendly set of adaptable visual reports. Additionally, RPM enables a specific inspection process to be designed once and then repeated and executed by anyone on the factory floor.
CAM2 2019 evolves this functionality to actionable intelligence by delivering statistically based graphs and results for trend analysis and predictive alerts. These alerts not only highlight that the measurement target is trending beyond tolerances, but also provide advanced intelligence into the process and why the situation is occurring.
“At this time in 2018, when we announced CAM2 2018, we highlighted that our software development energies would be directed to having our software enable our customers to realize the full operational potential of their FARO hardware,” stated Pete Edmonds, Vice President 3D Manufacturing.
“CAM2 2019 takes a big step in the continued evolution of the platform towards resetting industry expectations for what measurement software can do and should do to optimize the end to end measurement experience and value.”
www.faro.com

